Azure Migrate – Server Replication

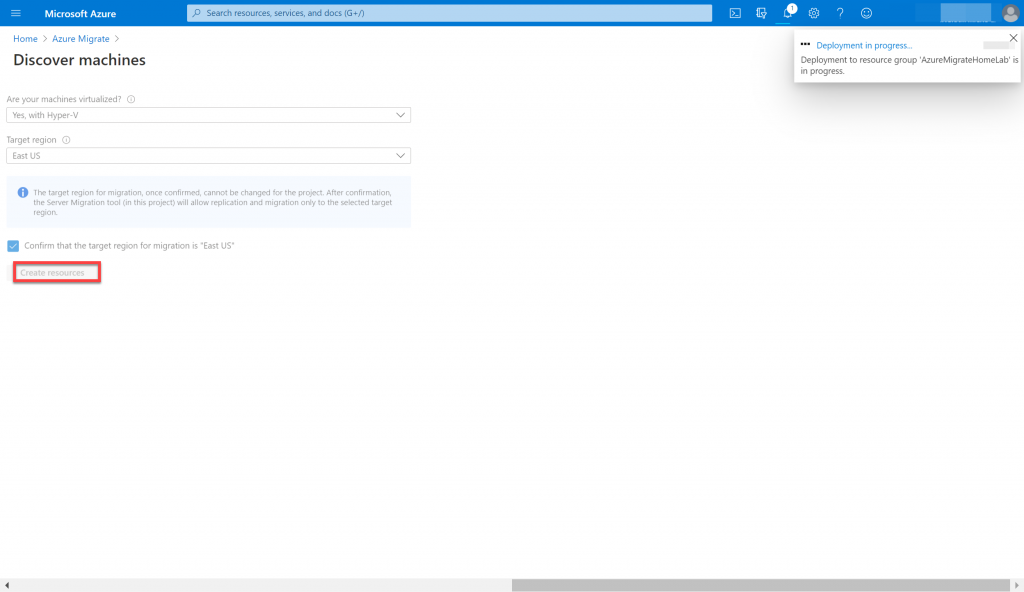
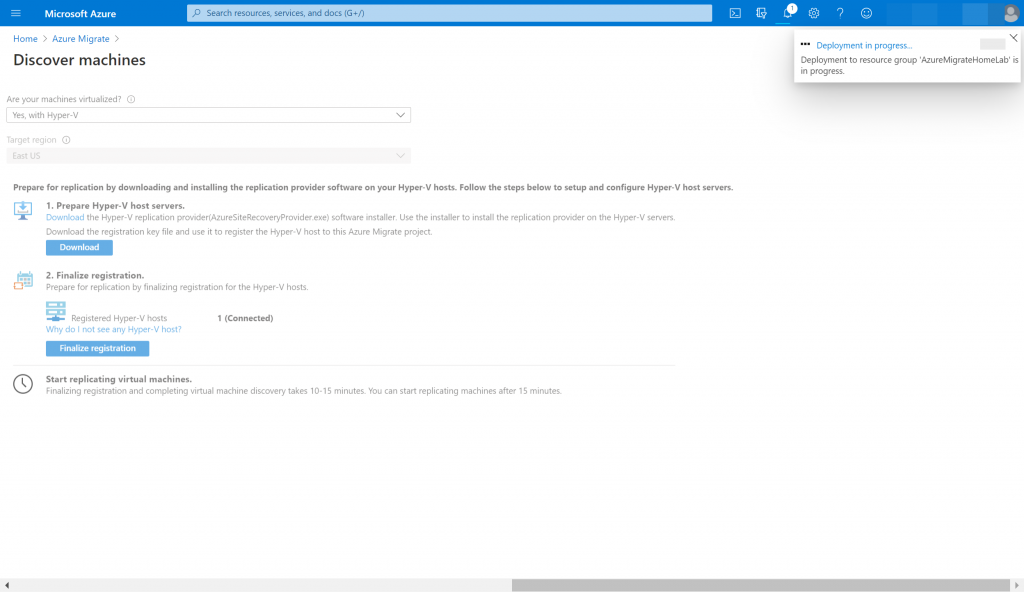
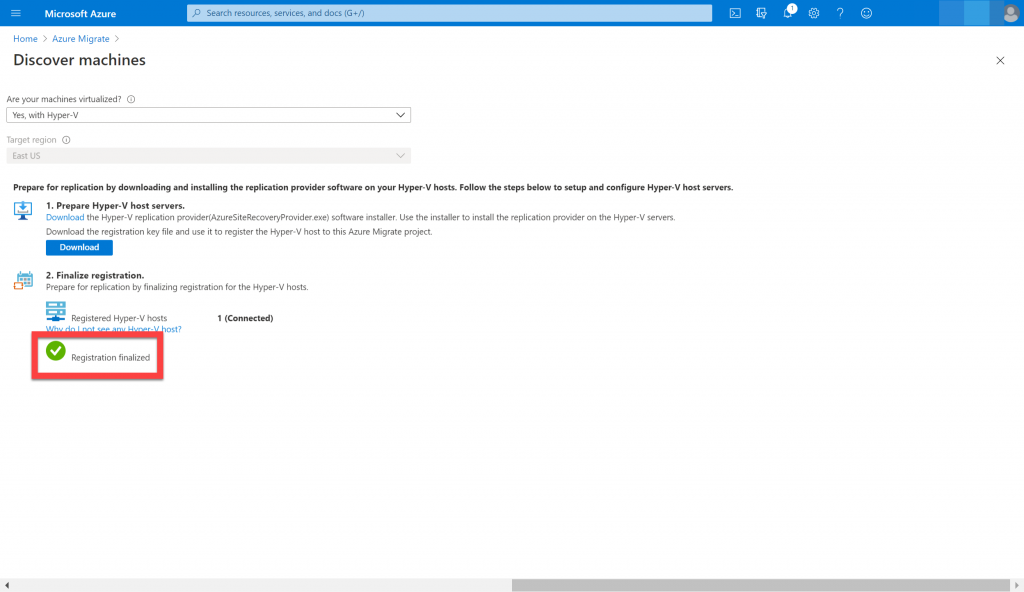
In this blog, I will cover the Azure Migration server replication process.

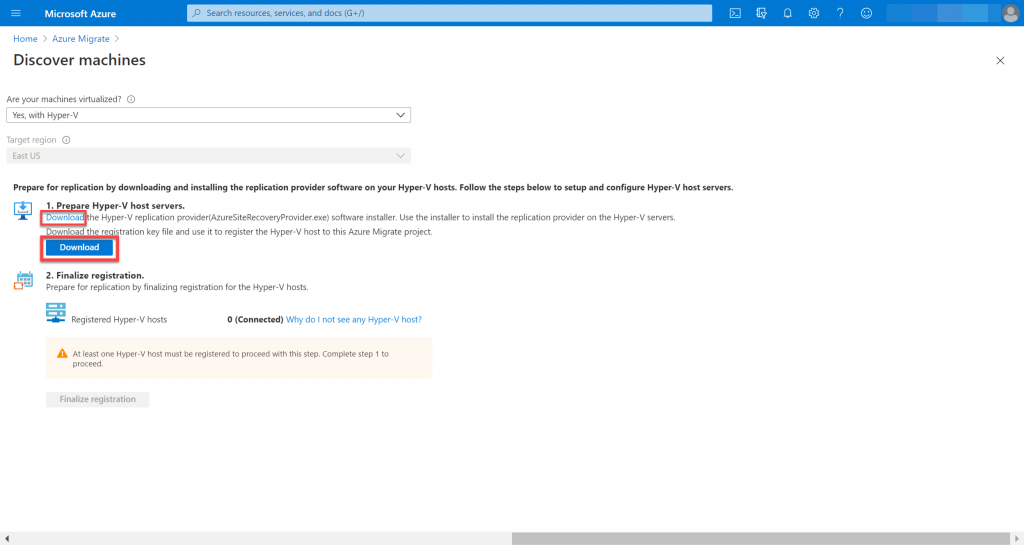
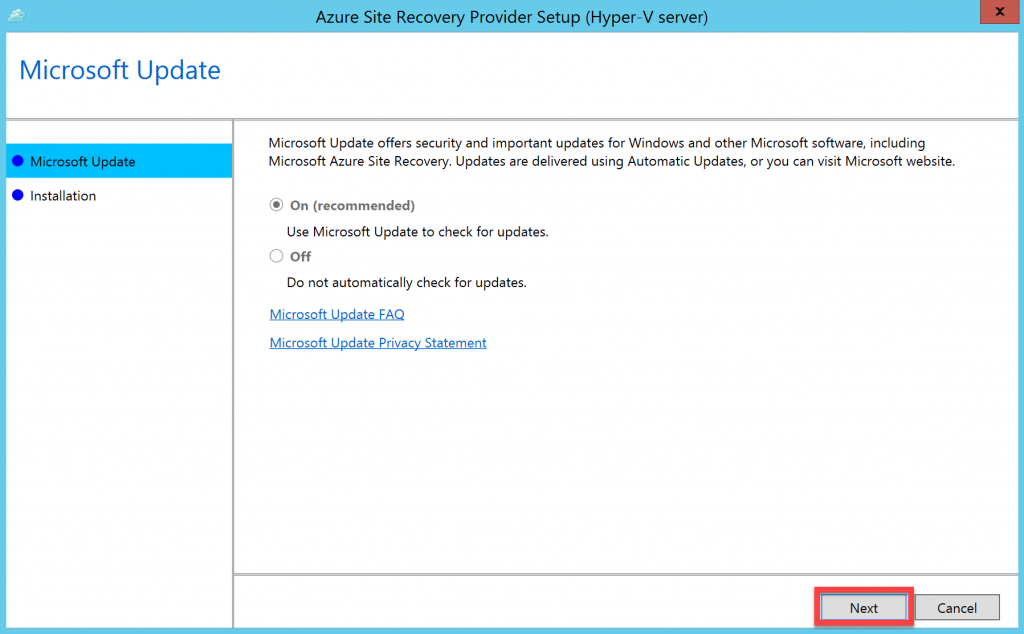
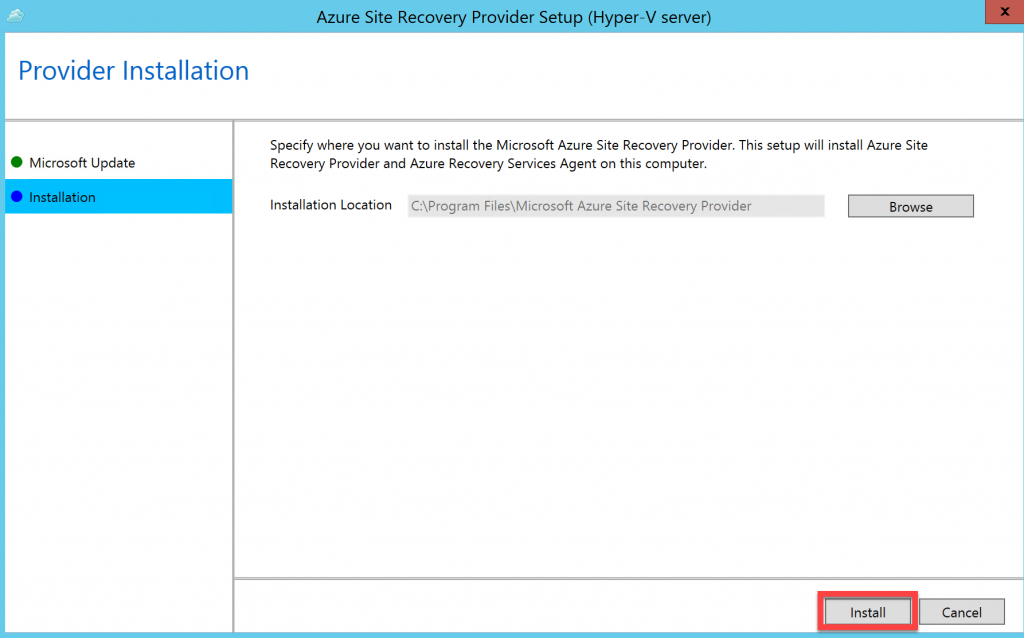
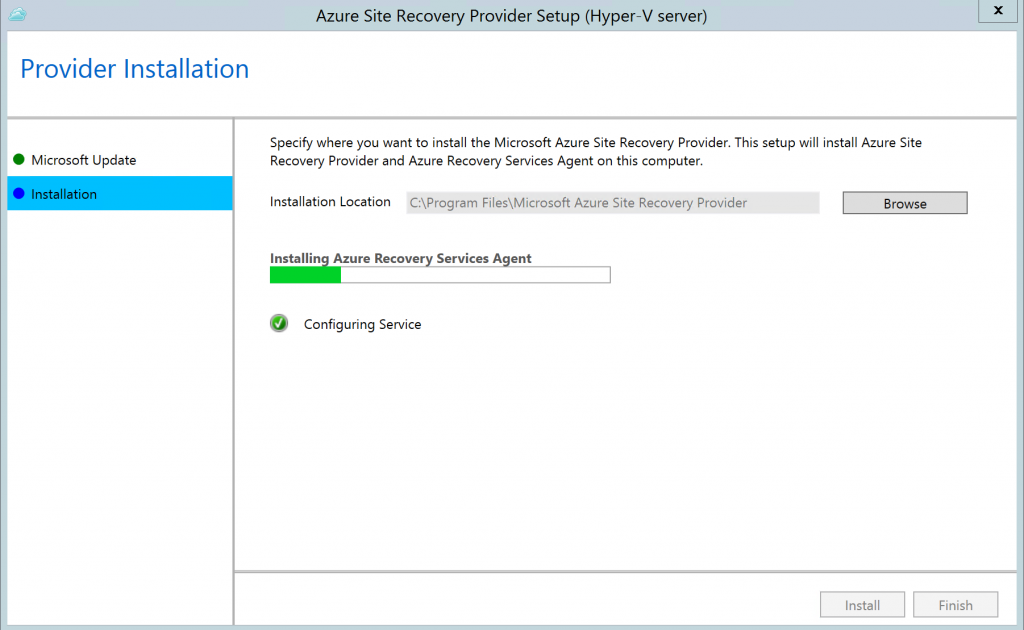
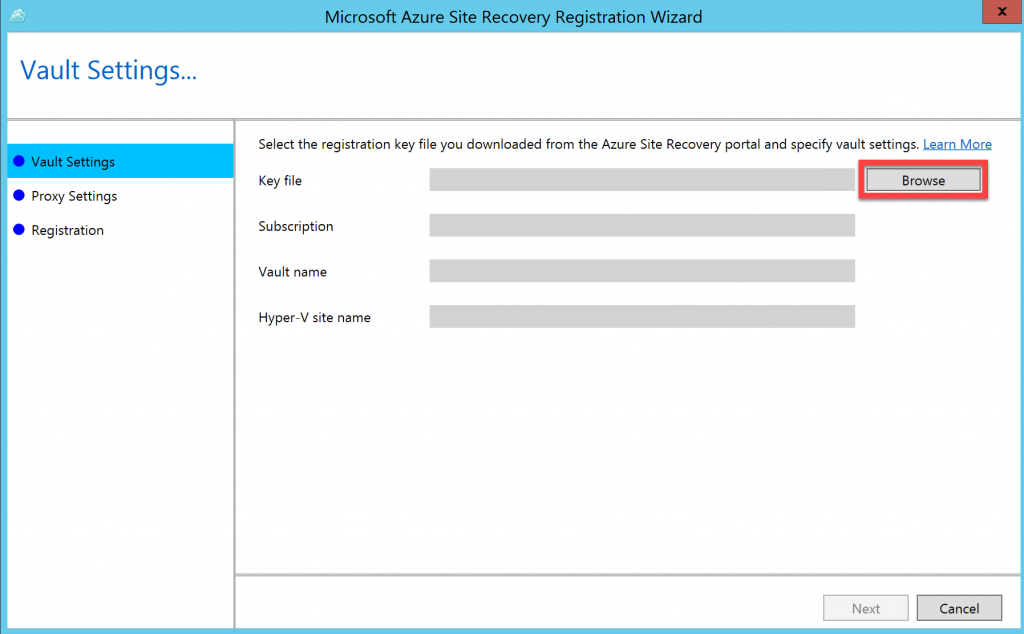
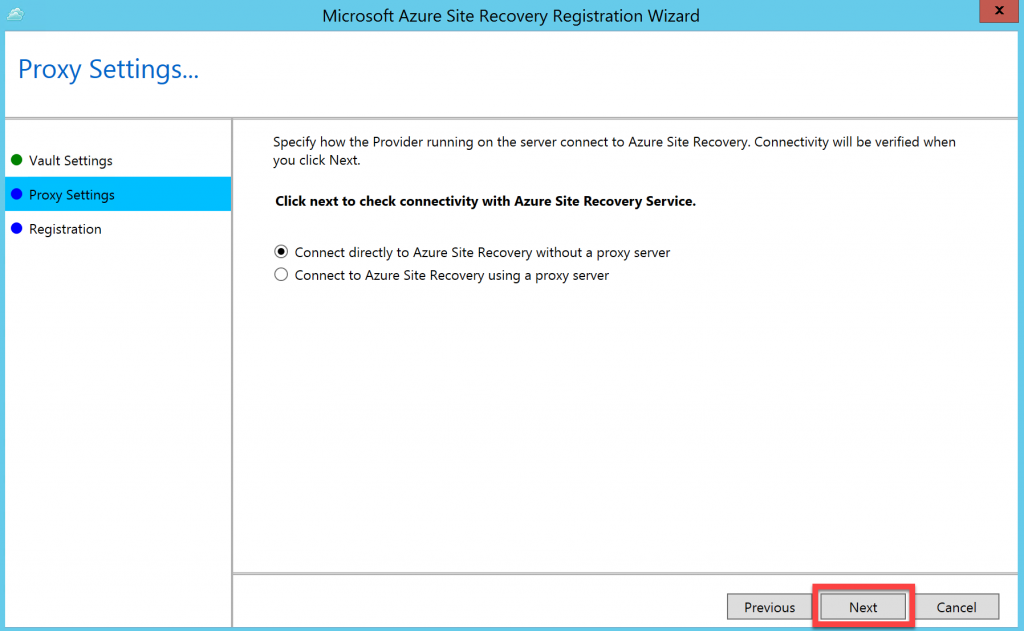
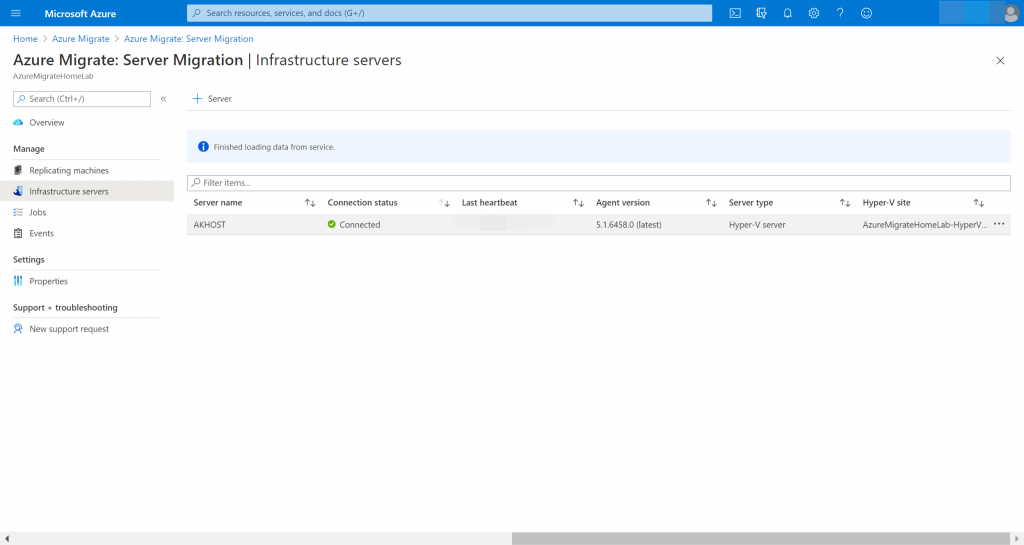
Download the Hyper-V replication provider and the registration key file to the host machine.

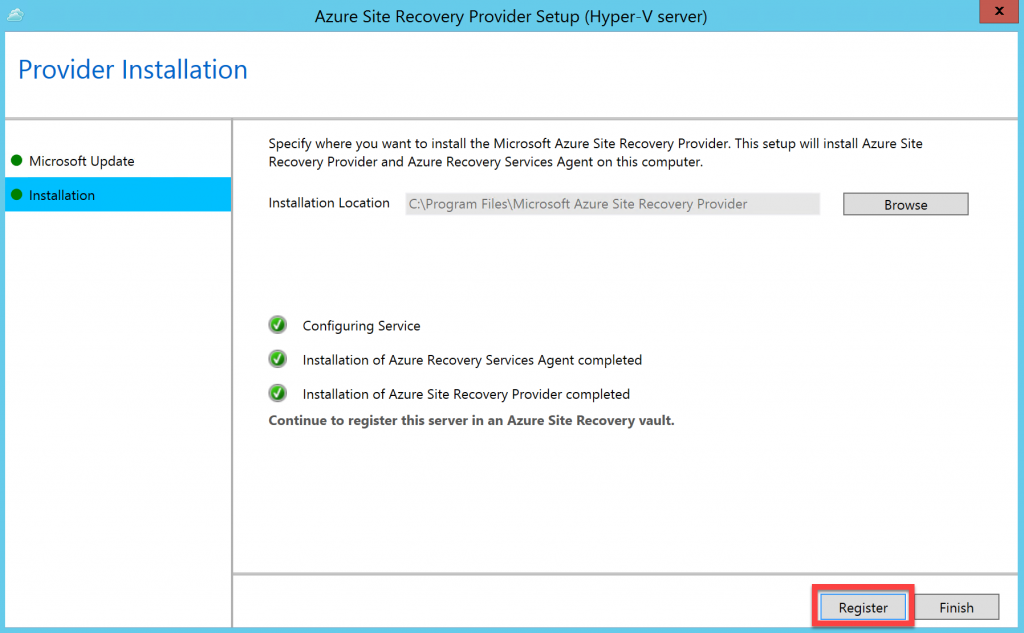
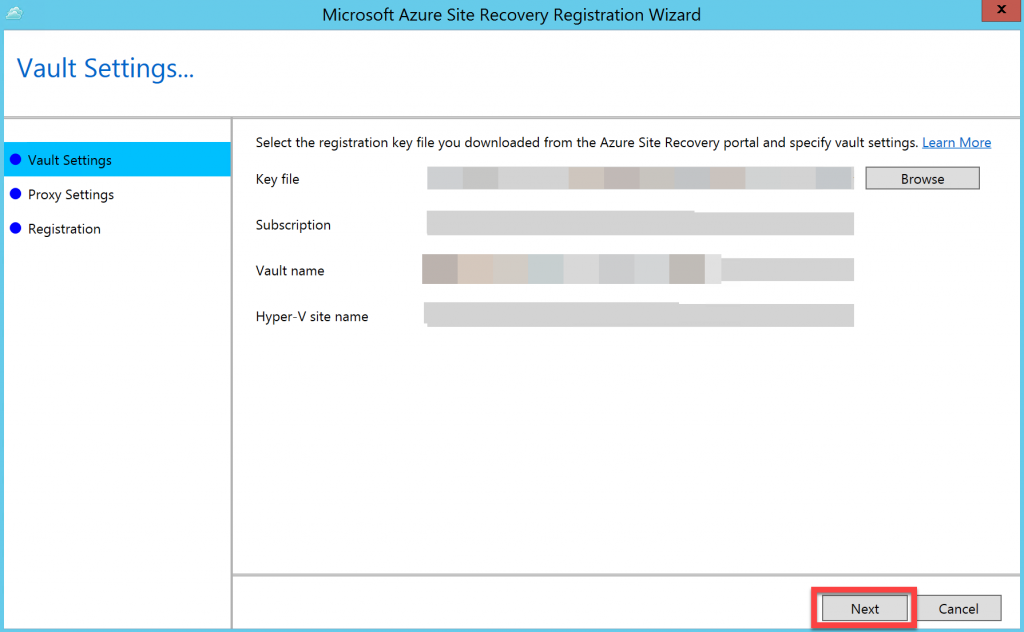
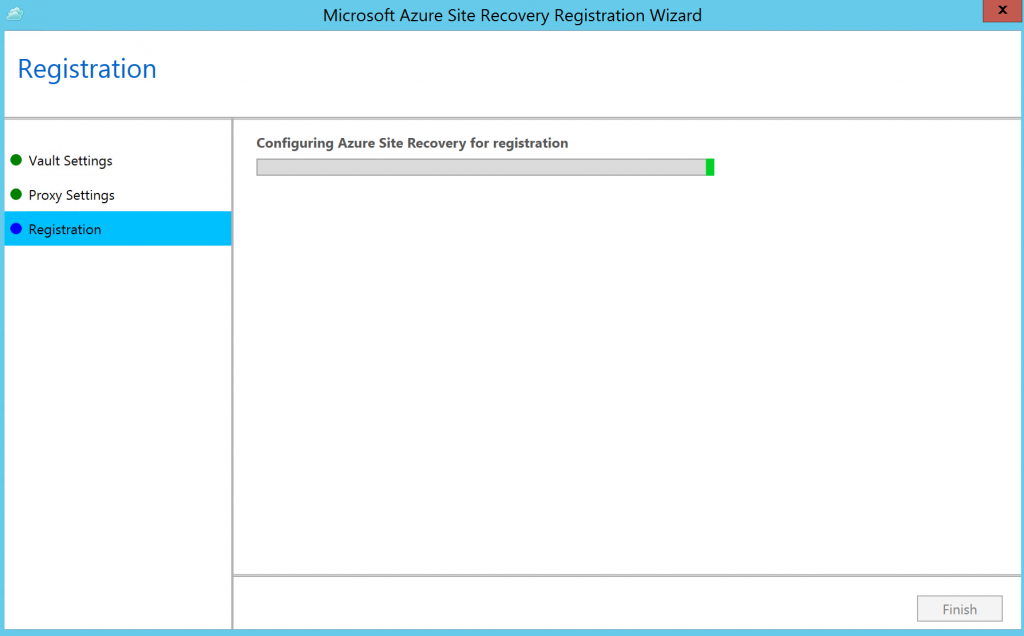
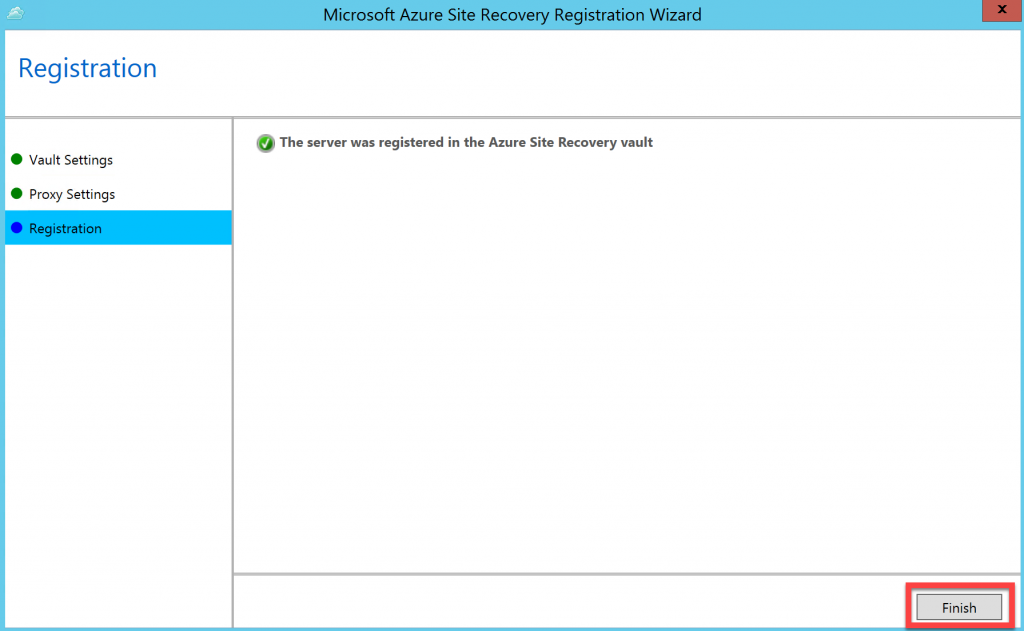
Go back to the Azure portal once the Microsoft Azure Site Recovery registration wizard is completed.

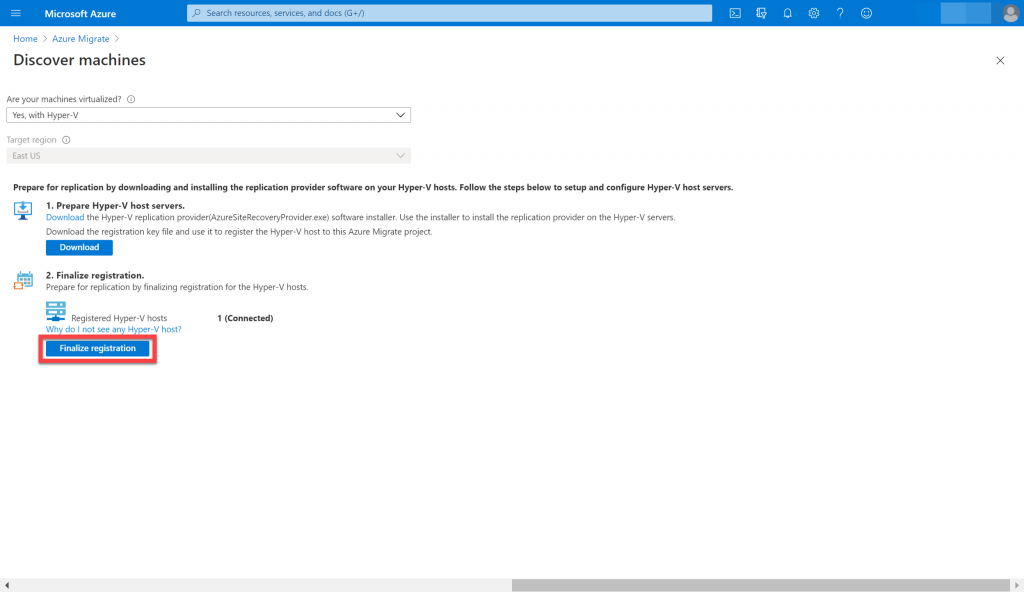
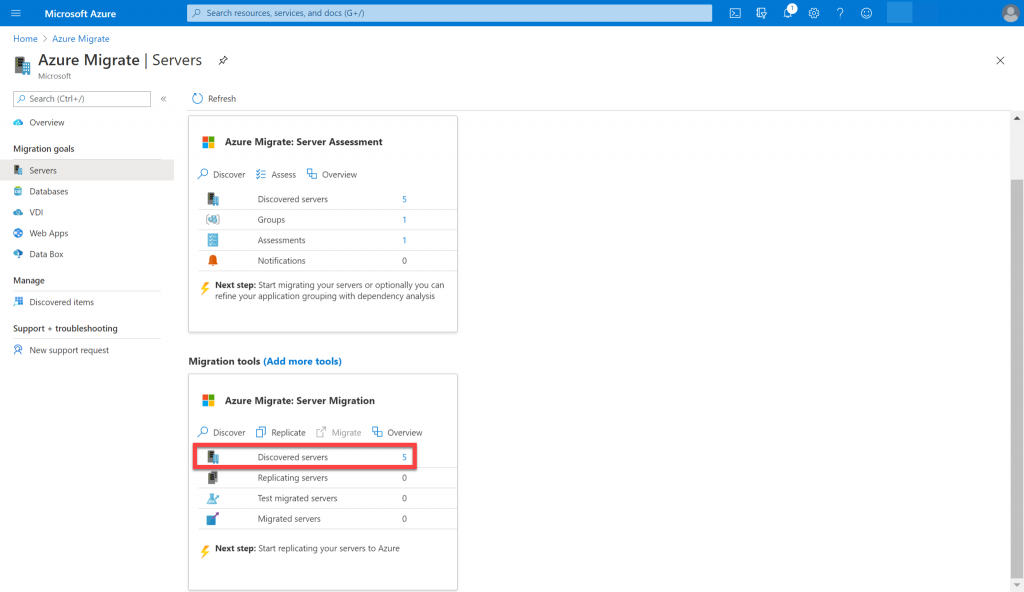
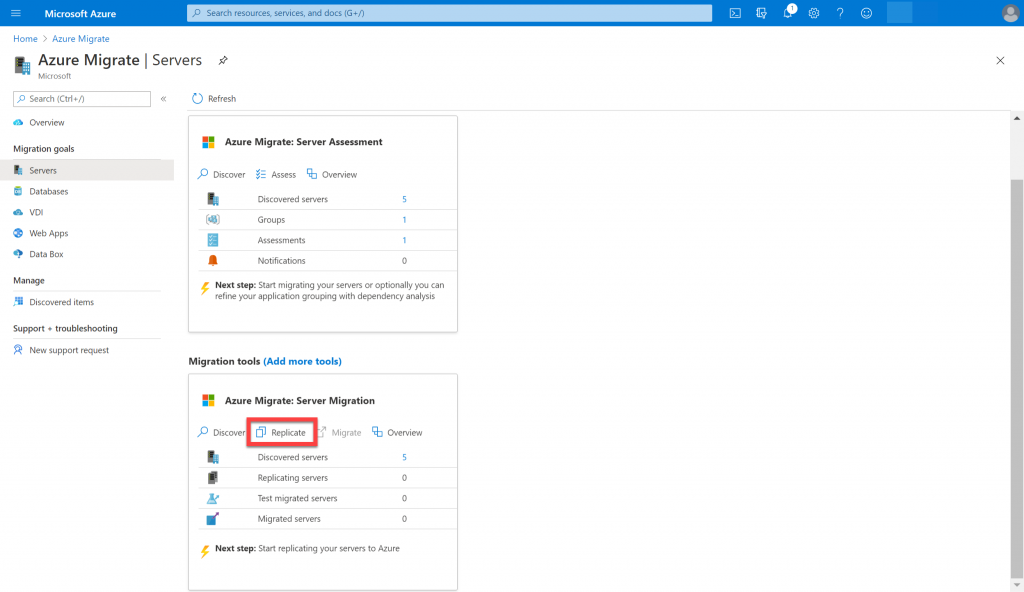
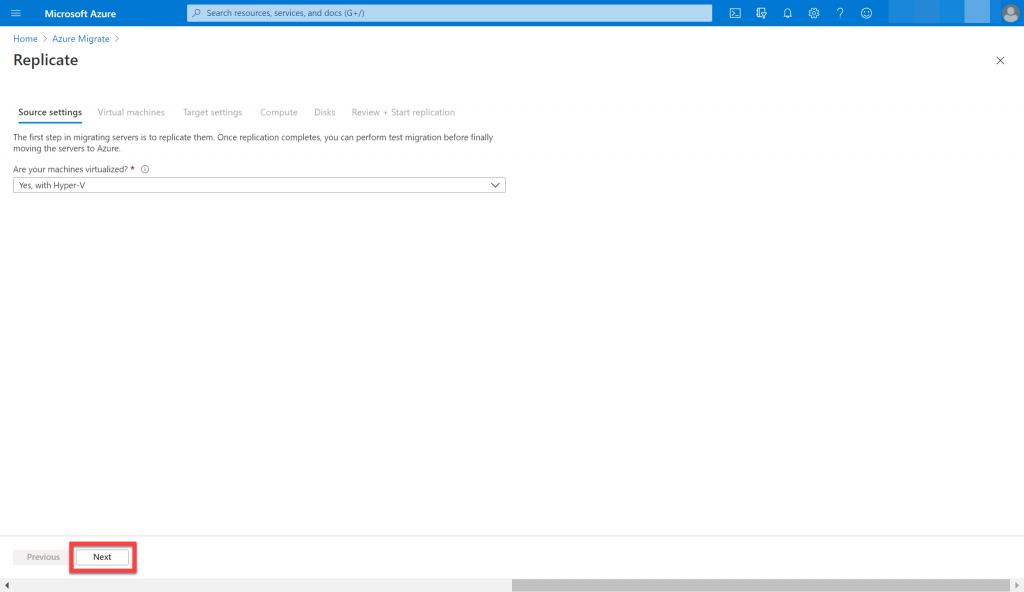
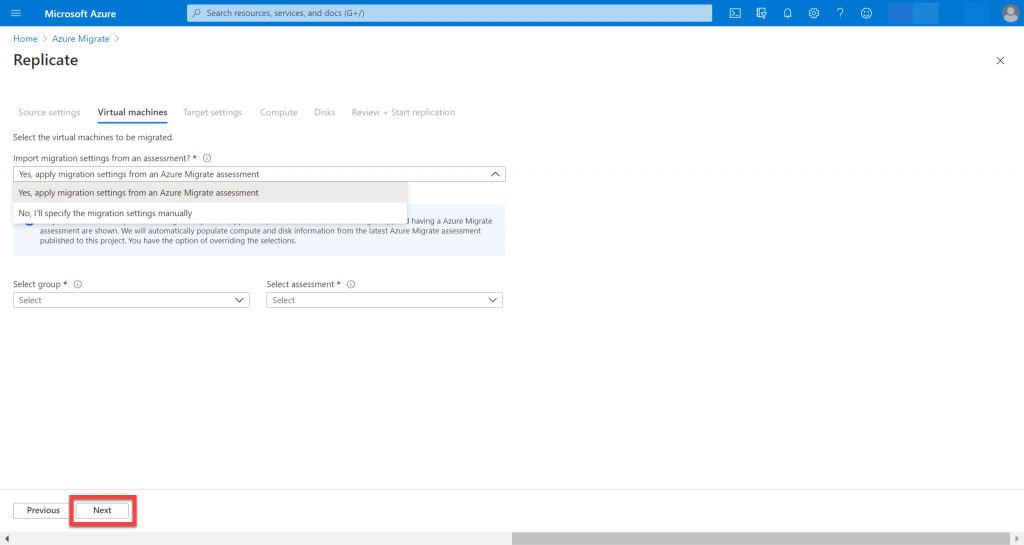
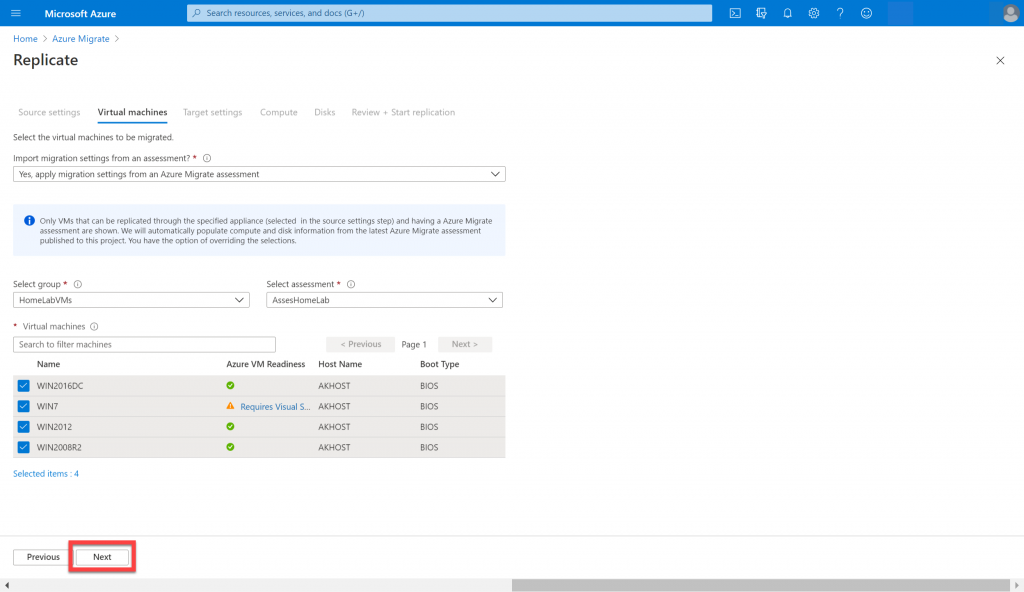
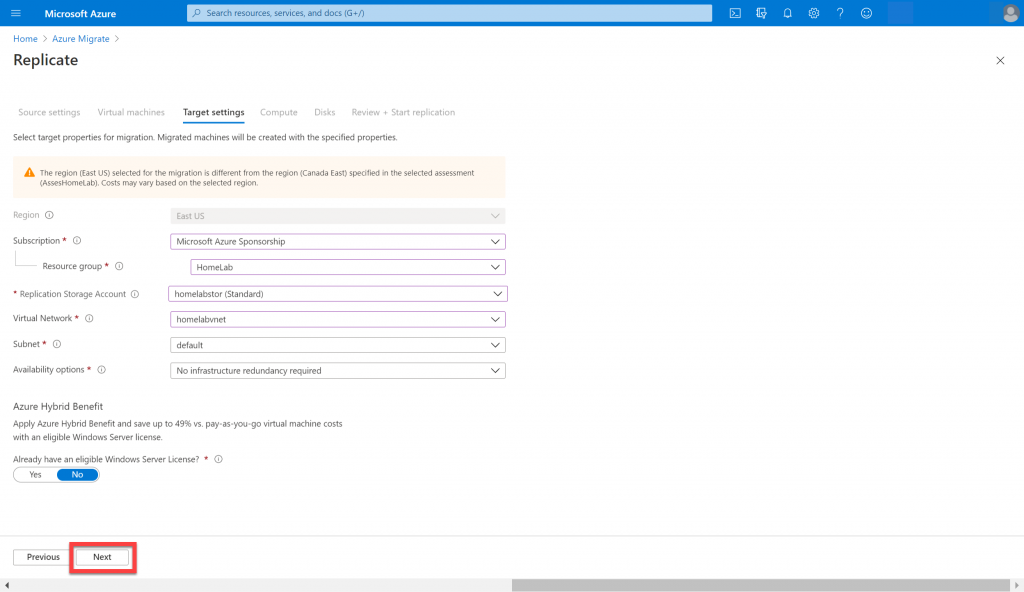
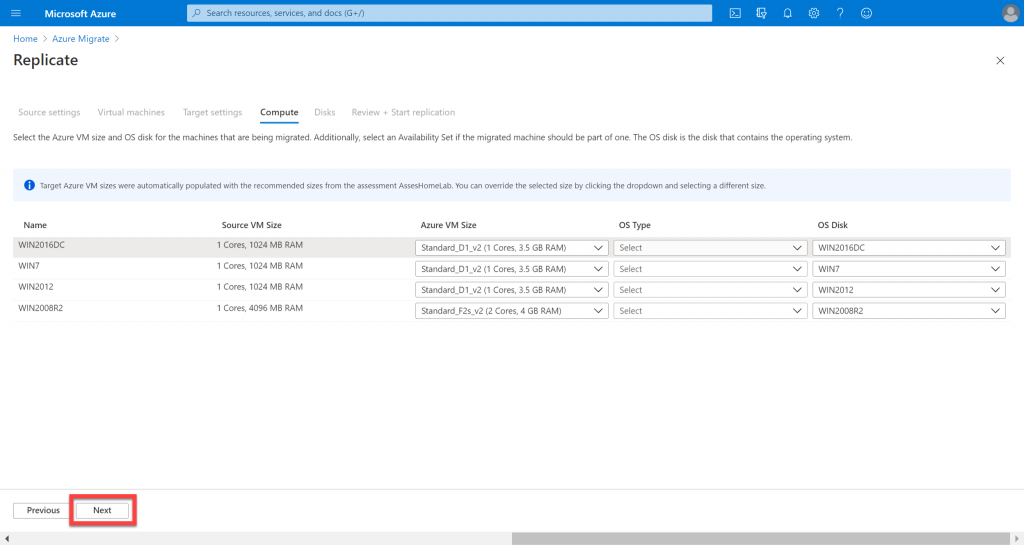
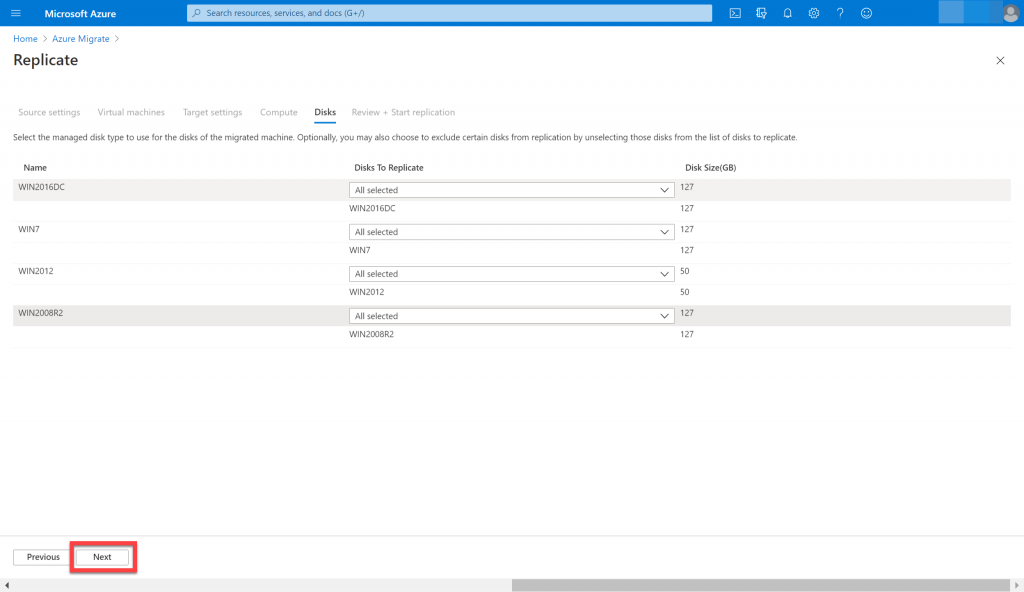
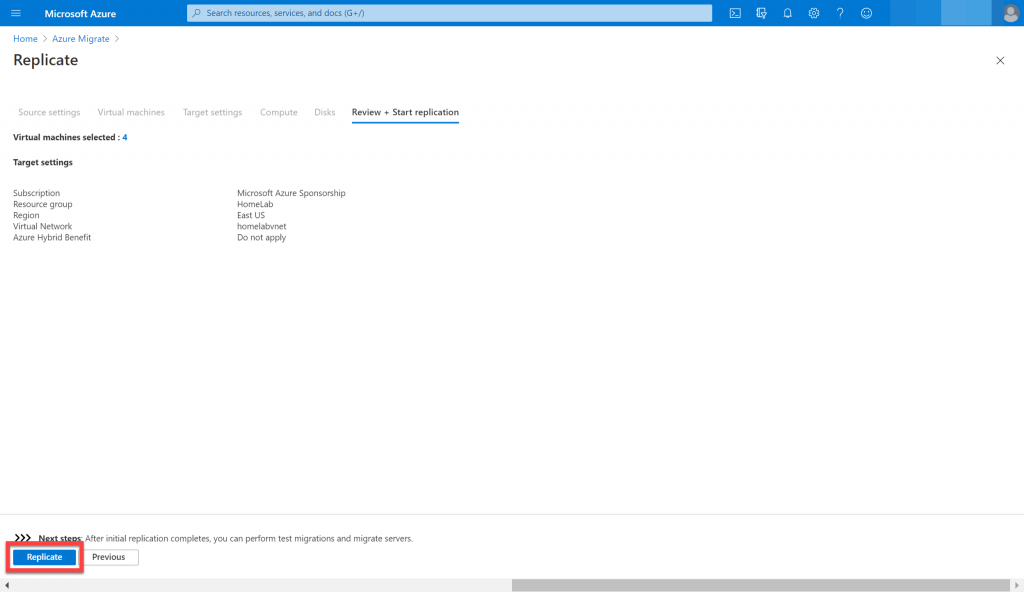
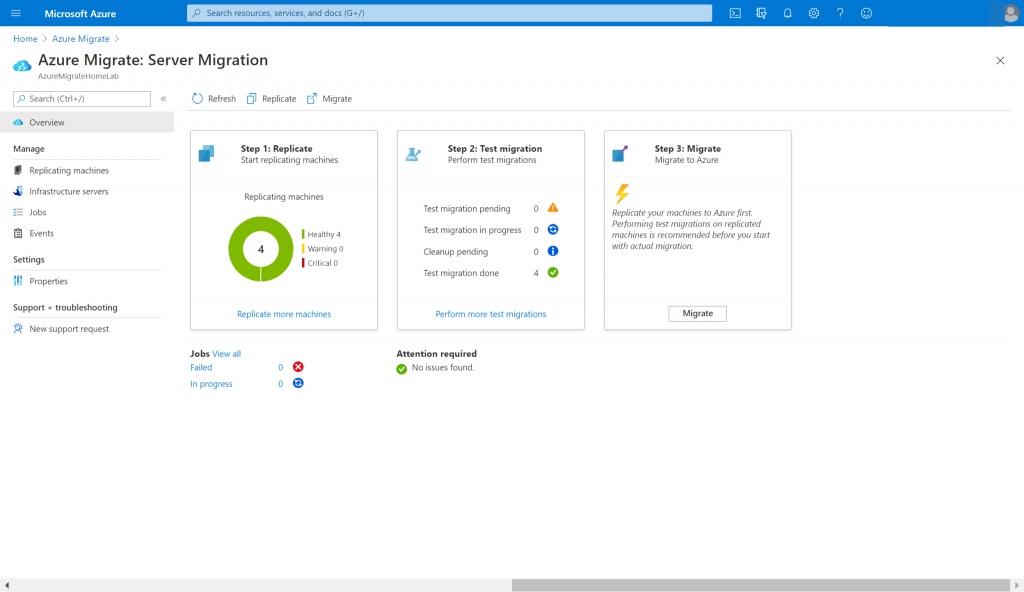
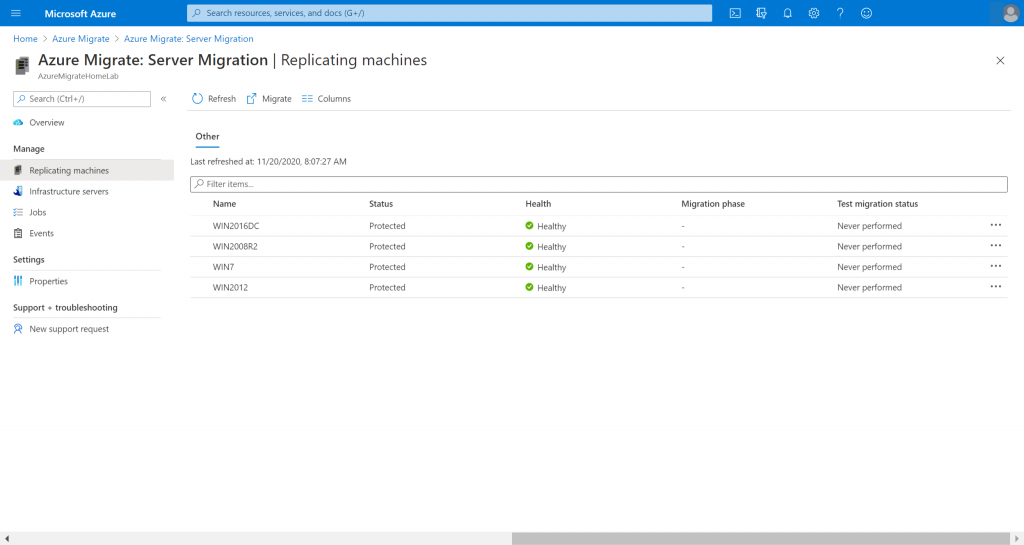
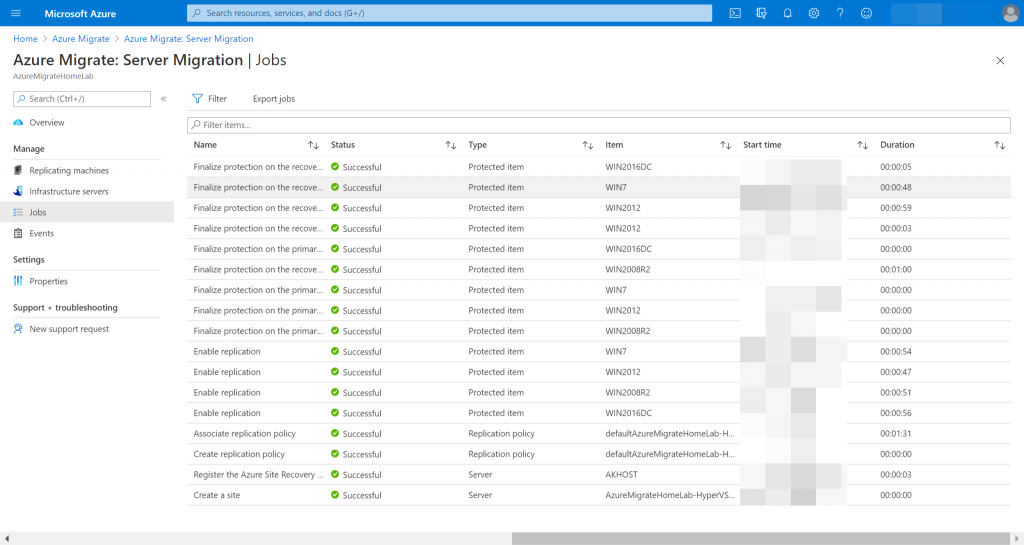
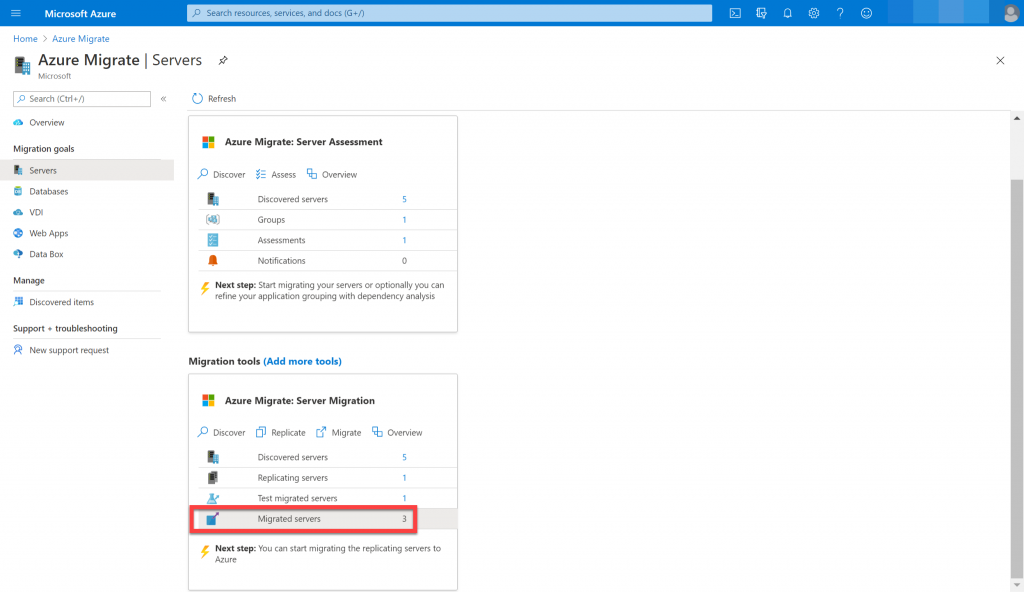
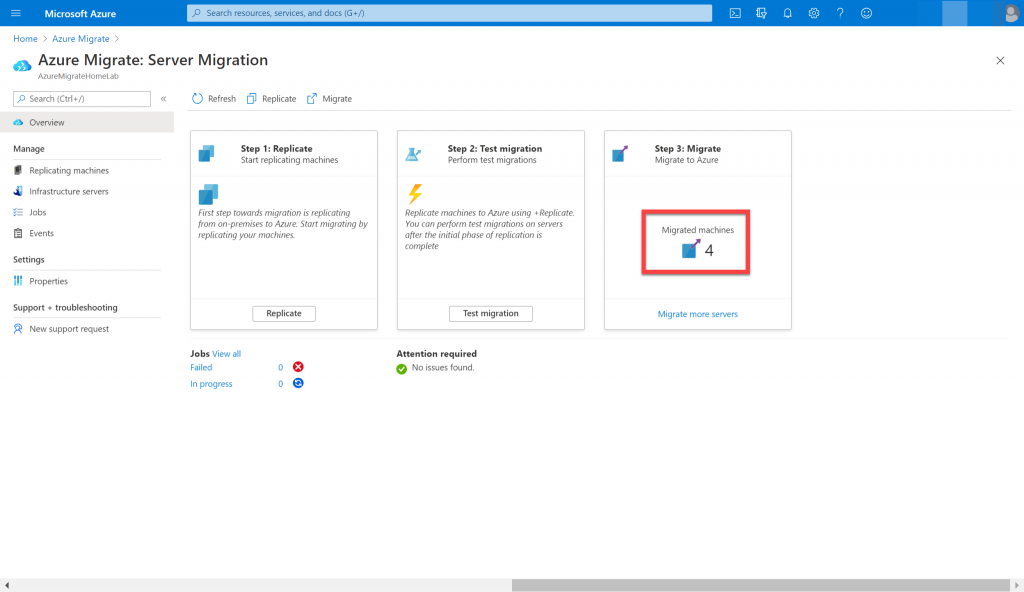
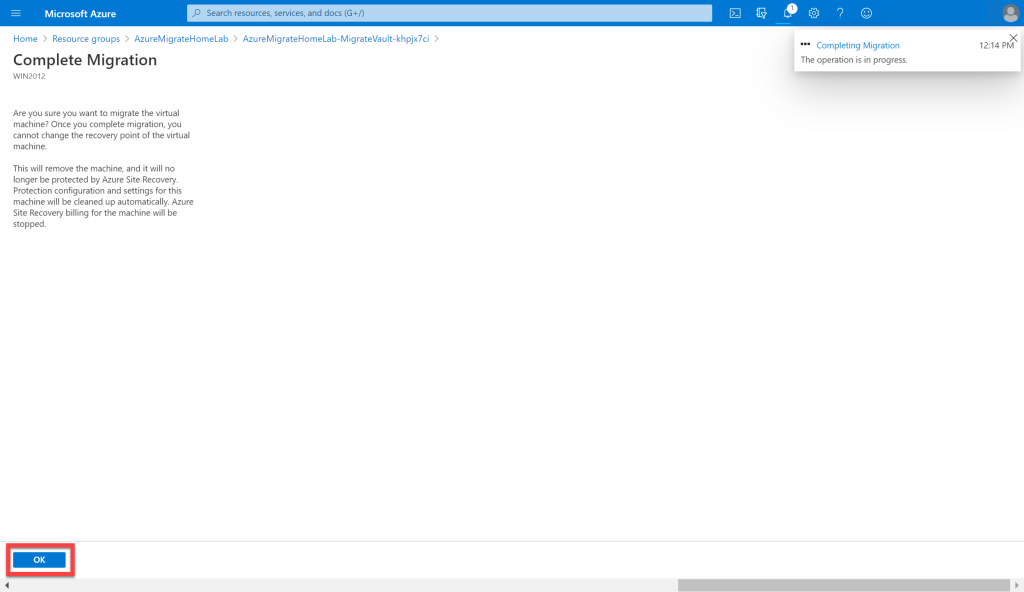
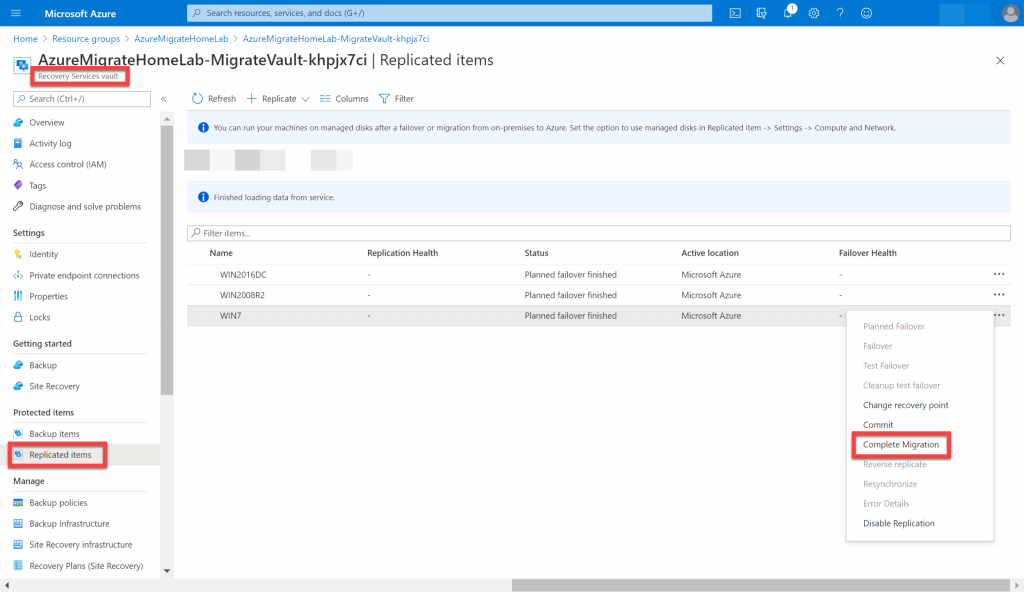
This covers the Azure Migrate server replication portion.

Azure Migrate – Server Assessment

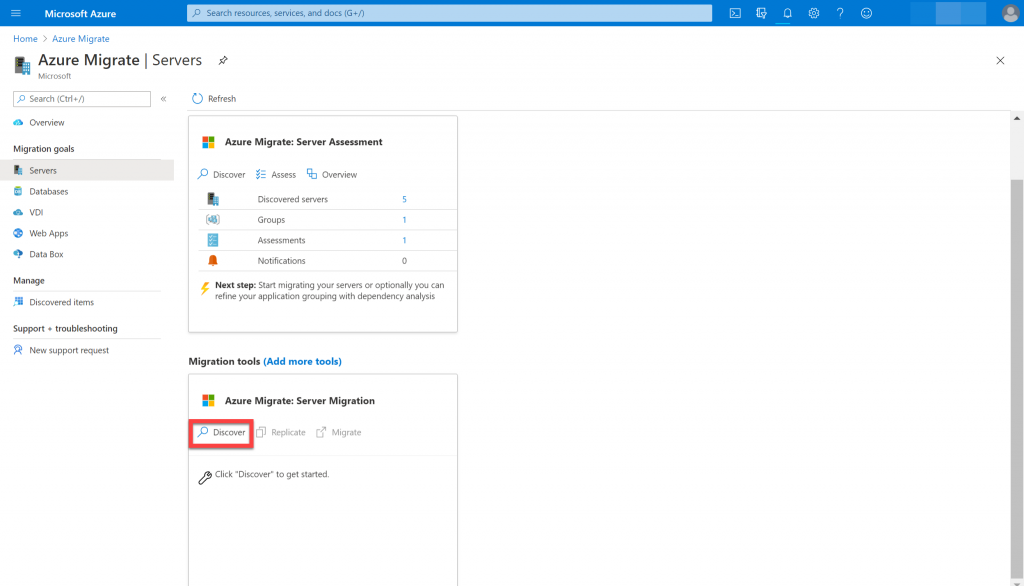
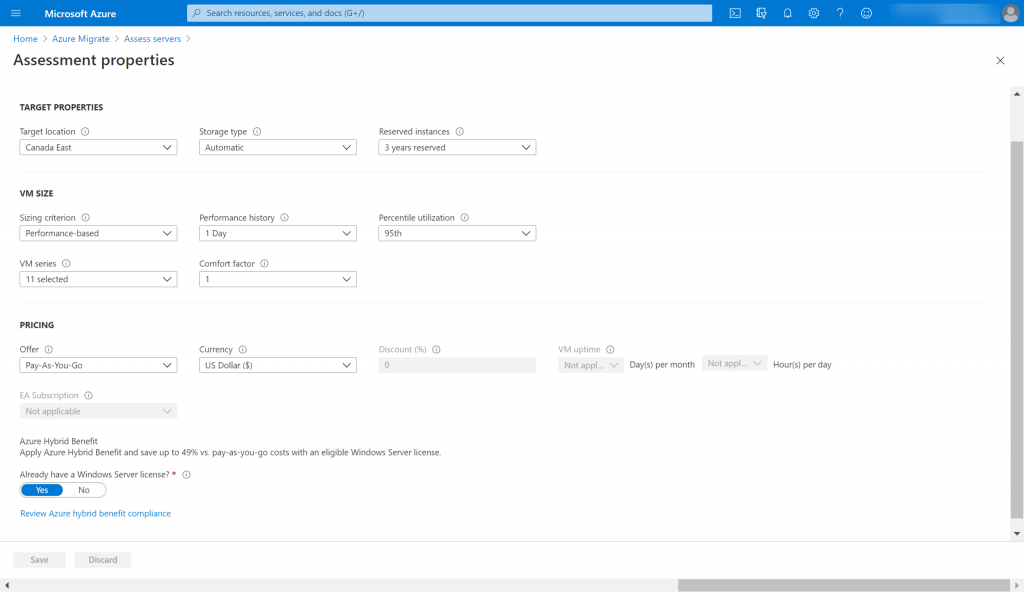
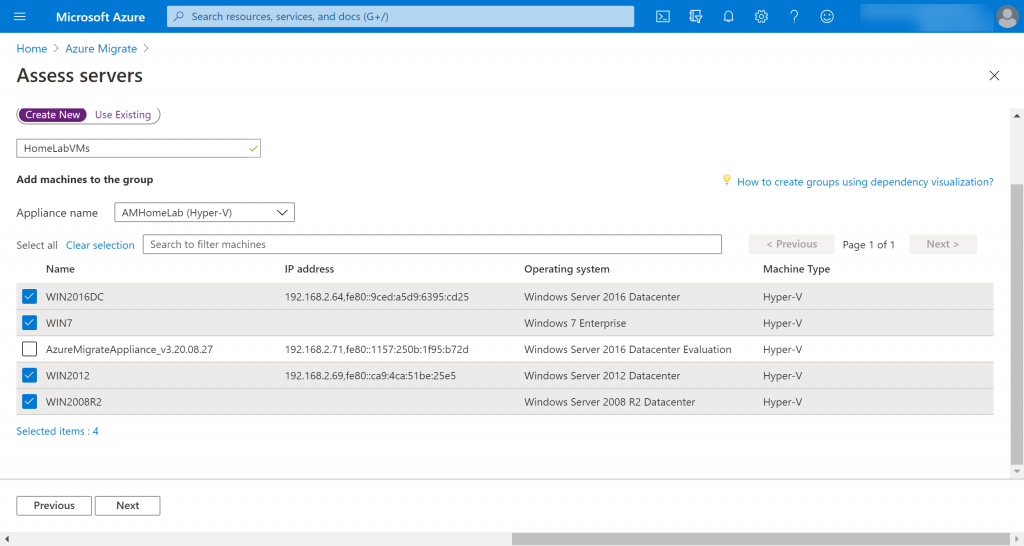
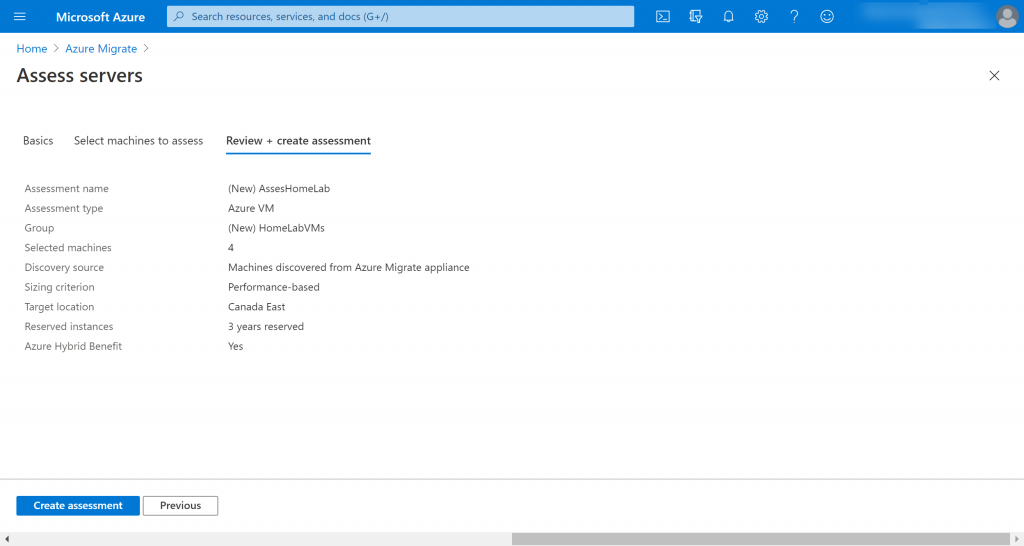
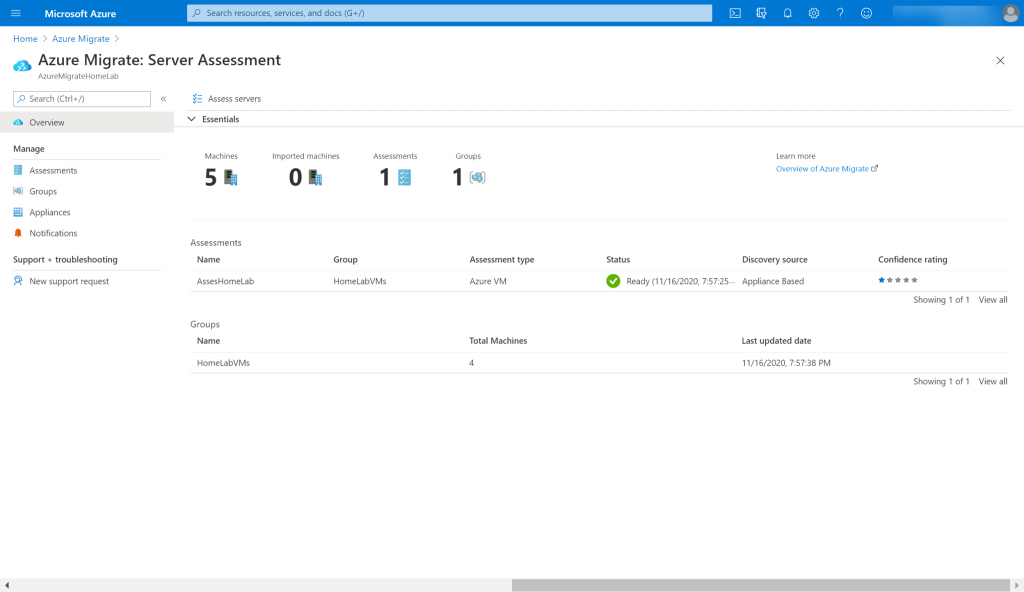
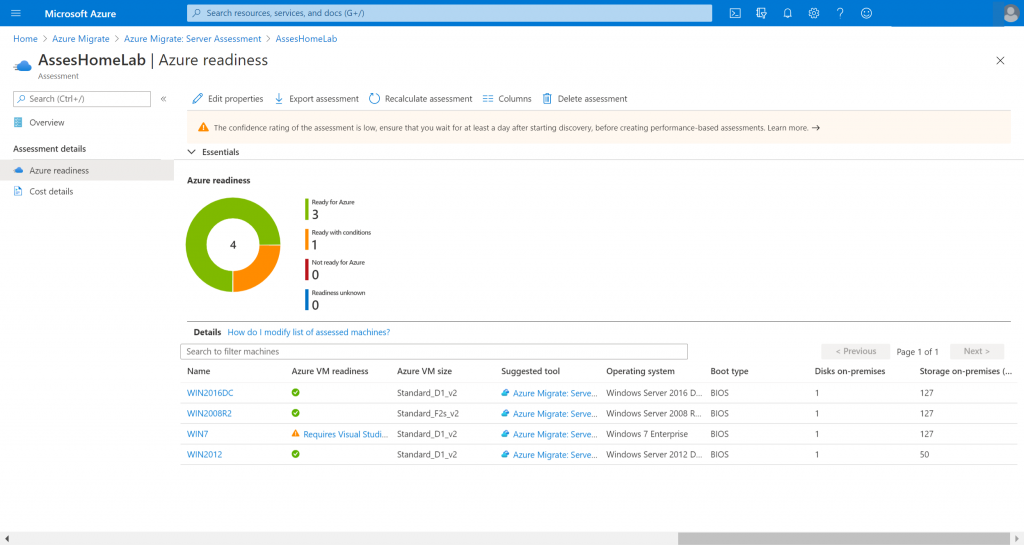
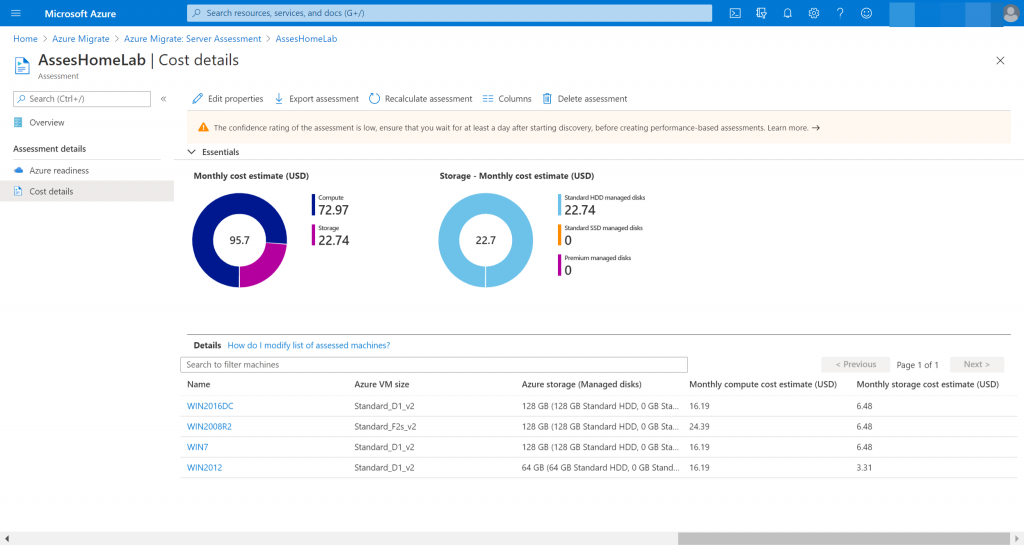
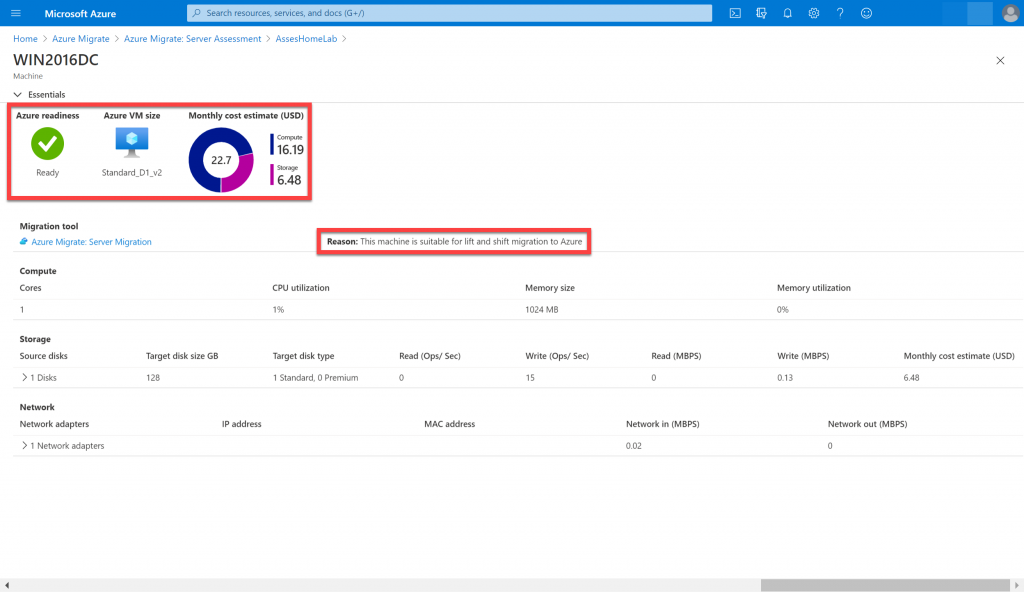
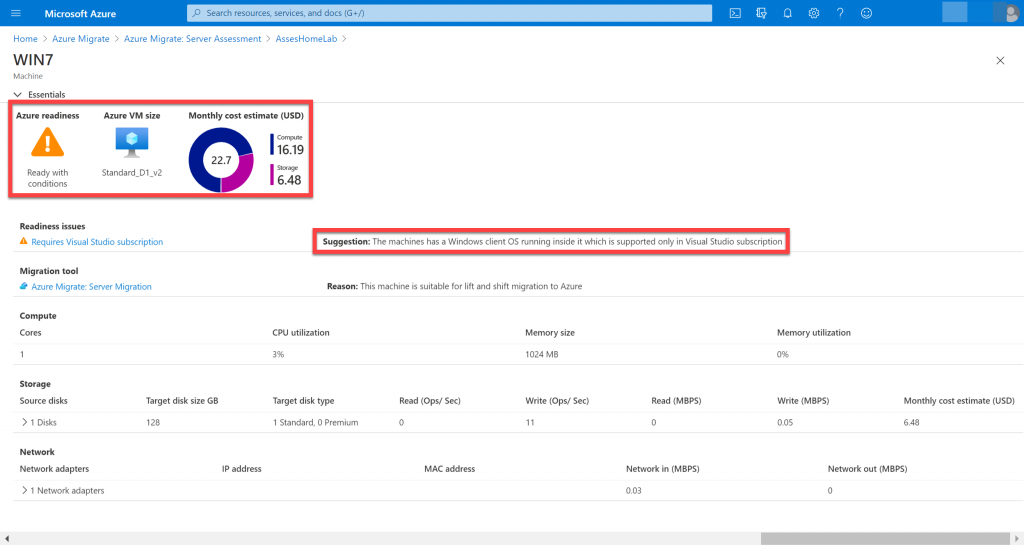
Since my previous blog post covered Azure Migrate – Server Setup the next step is to do the server assessment. In this blog post, I will walk you through assessing the on-premises server environment.

Click Assess to start the assessment process.
You can change the Assessment properties based on the requirements.
Different options to play with for the assessment criteria.
I choose not to include Azure Migrate application in the group.

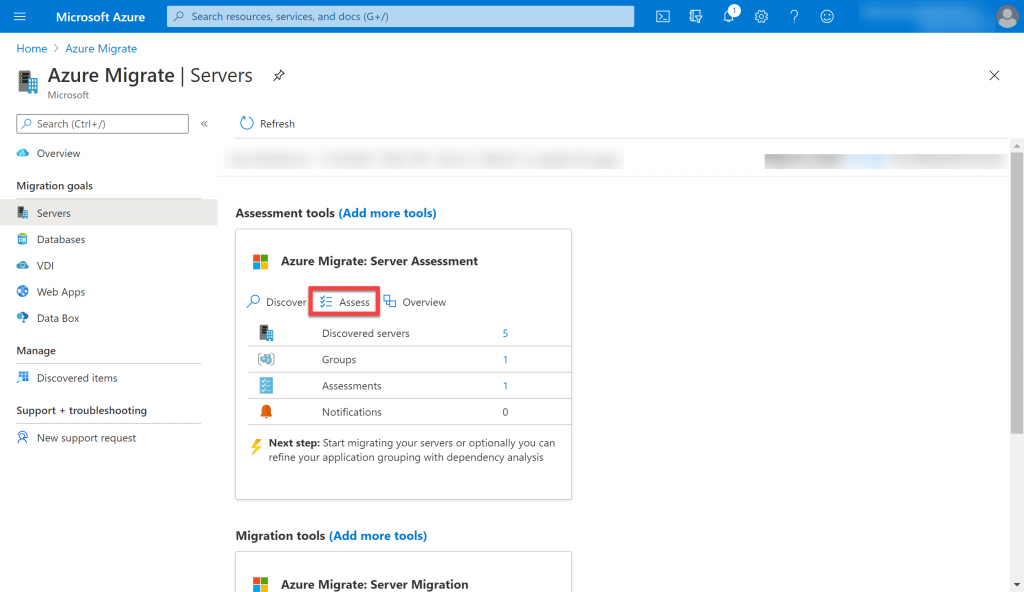
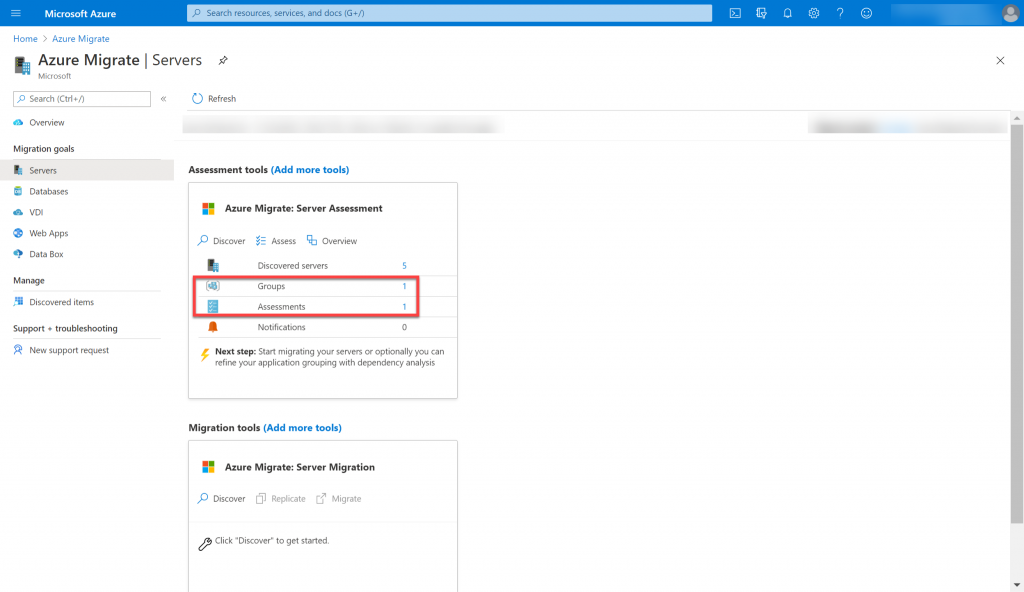
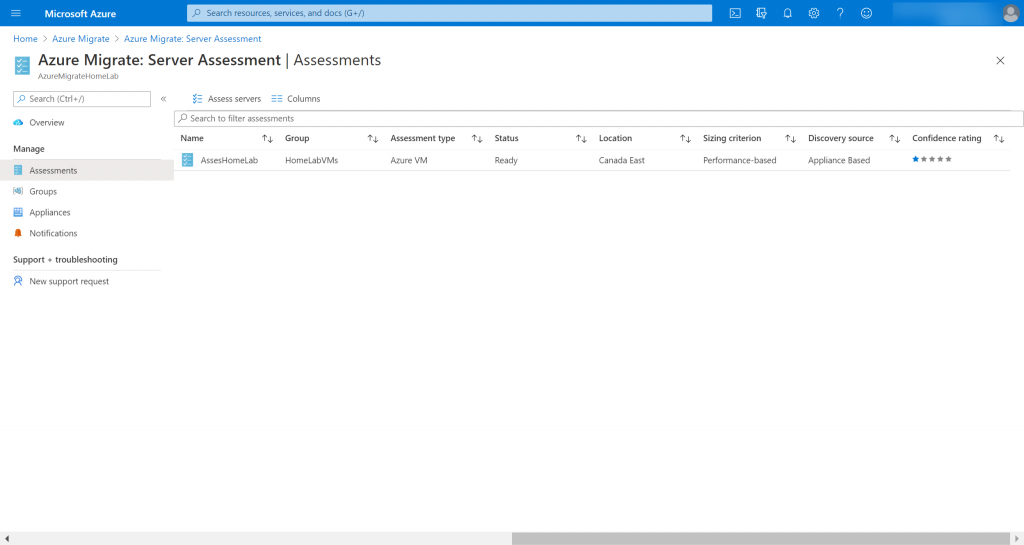
Lets take a look at the Assessments section.

You can edit the properties of the assessment, export it which will be in a xlsx format, recalculate the assessment and delete it.
Azure readiness tell you if the virtual machine can be migrated to Azure.
As you can see Window Server 2016 passed the Azure readiness and can be migrated to Azure.
Windows 7 has some readiness issue and did not pass Azure readiness.

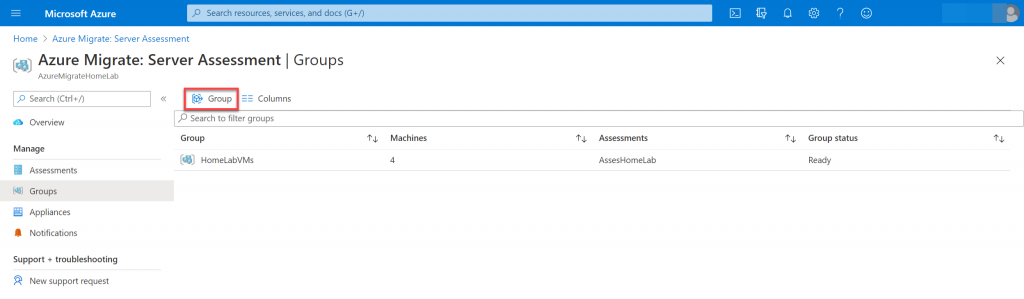
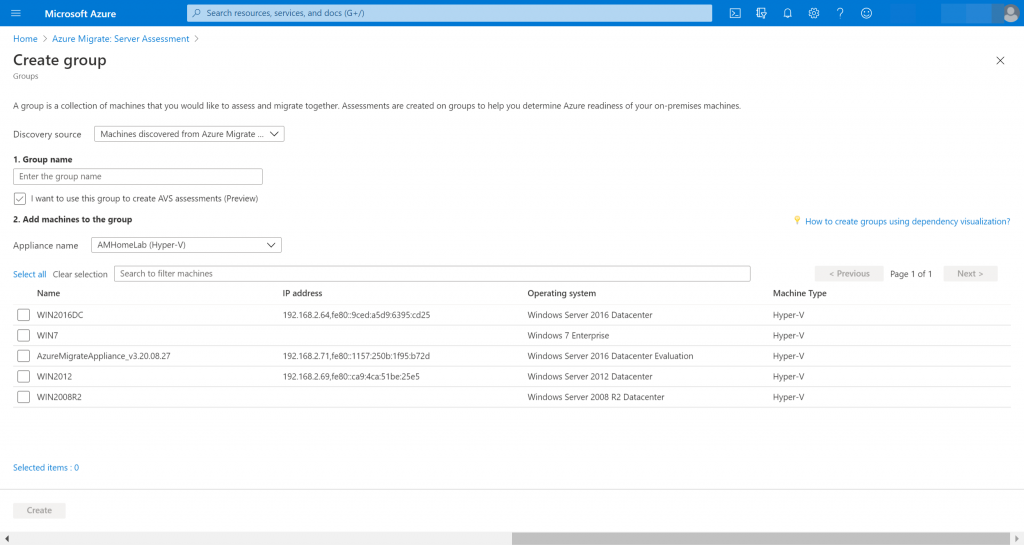
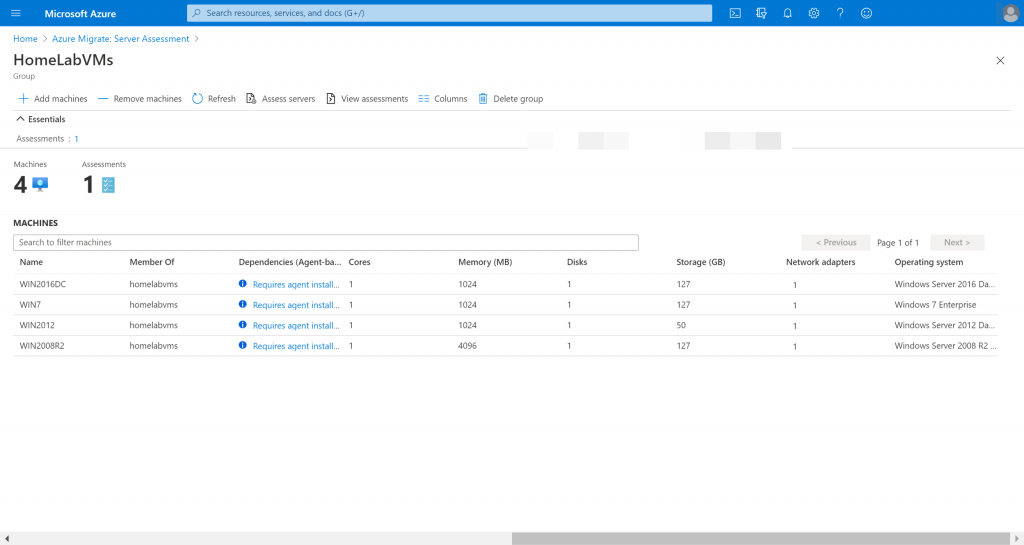
Lets take a look at the Groups section.

Click on Group if you want to create additional groups

Azure Migrate – Server Setup

I have been getting a lot of questions regarding Azure Migrate specially after the Azure Migrate webinar. In the blog, I will go through the Azure Migrate server setup.

Before we start the Azure Migration portion, lets setup a new Resource group.

Select the Subscription and Azure Region you want to use.
Once validation passes, click “create”
As you can see the new Resource group has been created.
Search “Azure Migrate” on the search bar
Click on “Servers” since we will be doing server assessment and migration.
Click “Create” once you fill in the migrate project name and select the geography.
Click “Discover” to download the Azure appliance.
There are three options for Azure Migrate appliance so choose the one that fits your environment.
Click “download” Please note that the Azure Migrate application is a 12 GB file so it might take some time to download.

Now that you have download the Azure Migrate appliance, its time to import it. Since I am using Hyper-V, I will import the appliance to my Hyper-V host.

Once you power on the Azure Migrate appliance, the first screen will show the license terms and click “Accept” to go to the next screen.

Click on Microsoft Edge and it will open the Appliance Configuration Manager. You can access the application by https://appliance name or IP address: 44368.
Enter the generated key to register the appliance.

There you have it. All the virtual machines should have been discovered.